|
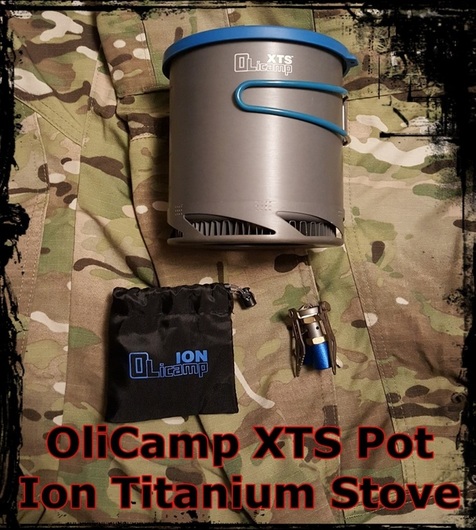
OliCamp XTS Pot & OliCamp Ion Micro Titanium Stove OliCamp XTS Pot: Weight: 7.7oz MSRP: $29.95 OliCamp Ion Micro Titanium Stove: Weight: 1.6oz MSRP: $49.95 Boil Time with XTS Pot: 2 minutes (16oz) 3.5 minutes (32oz). Fuel Consumption: 8g per 3.5 minutes (using highest setting) Note: With an 8oz fuel bottle you can use this stove almost 30 times to boil 32oz of water (which is usually twice the typical amount of water used for prepping freeze dried food). So this stove is actually very fuel efficient.
0 Comments
An often overlooked item is the PSK (Personal Survival Kit). I believe every hiker, backpacking, bushcrafter and outdoorsman should have and carry one. This kit should contain the 5Cs or 10Cs of survival and if possible other items. This should be small enough to carry in a pocket or on the belt. This kit is designed to be carried on your body at all times when outdoors. This can end up saving you. If you end up having to ditch your pack for any reason, get lost from your base camp or one of any other hundred scenarios. There are several variations of the 10Cs list, one of the most popular is Dave Canterbury's list which is great but as with any list is not the "be-all and end-all" list. Every kit should be customized to your needs. This is my list of the 10Cs Not listed in any specific order: 1: Cutting Tool (Knife) 2: Combustion (Fire stuff) 3: Cover (Tarp/Shelter) 4: Cordage (Rope/Line) 5: Candle (Light) 6: Compass 7: Cargo Tape 8: Cotton (Bandanna) 9: Communication (Signalling) 10: Container This Condor Pocket Pouch is just barely large enough to carry what I want in my kit. This can be mounted to a belt (or molle webbing), loop for attaching with carabiner or be carried in a cargo pocket which is my preferred method. I keep my bandanna in the front pocket, otherwise everything else fits inside the pouch. 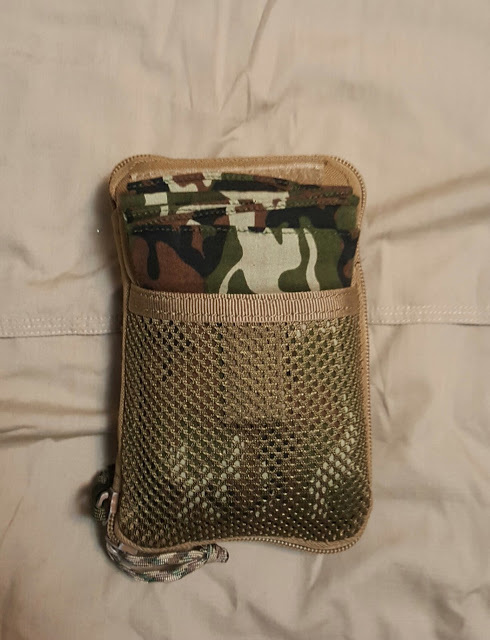 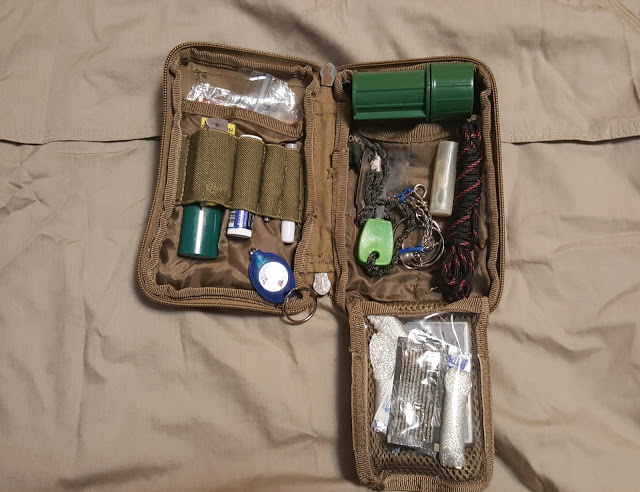 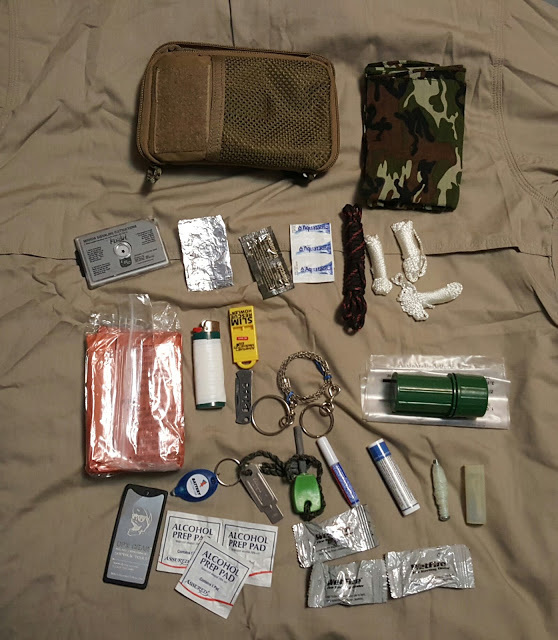 In my PSK I cover my 10Cs excluding a compass.
Here is a list of my contents: Cotton Bandanna AMK Emergency Blanket sealed in bag Heavy Duty Foil Bic Lighter (wrapped in tape) 3X Alcohol Prep Pads 3X Wetfire Fire Starters Key chain LED Light Fishing Line Fishing Kit Liquid Bandaid SOG Micron Knife LMF Firesteel AMK Whistle NDUR Wire Saw Water Tablets (Aquatabs & Aquamira) Chapstick UCO Stormproof Matches & Tube Starflash Signal Mirror 2X Small Cordage 1X 550 Firecord MRE Hot Beverage Bag DPX Gear Survival Tool (use for making another knife) As you can tell, my kit has some redundancy... What can I say, I really want to be able to make fire when I want! This kit should compliment but not replace your EDC (Every Day Carry) items. Feel free to let me know what you think about my kit or what you carry in your kit. Thanks for reading! So I purchased the Outdoor model about 3 months ago. Specifications: Battery: 3.7V LiPo Internal Battery (non-replaceable) Power: 2 Small Solar Panels Weight: 3.75oz Size: 5" round x 3/4" tall (compressed) Size: 5" round x 4.5" tall (inflated) Lumens: 65 peak Waterproof: Yes (even floats) Advertised Battery Life: 12 hours on bright (lowest setting). 7 hours on super bright (highest setting). Price (MSRP): $14.95 Outdoor Model $24.95 Aura Model. (They do make a couple other models which I haven't used yet). When I first saw this inflatable (yes you blow it up like a beach ball), I was quite curious. I've used several other camp lanterns, but nothing like this. The lantern body is made of a thick PVC rubber material which gives it a good quality feel and doesn't make you think it could pop at any second. The Outdoor model is a clear PVC the Aura is a "frosted" coated PVC. It packs up very flat and weighs in at 3.75oz (slightly less than the 4oz as advertised by MPowerd). It can be blown up with one breath so time and effort is very minimal. It charges to 100% from a dead battery in 8 hours in good sunlight, which is pretty awesome considering the size. I tested the battery life on the brightest setting and it got a little over 7 hours so I figured it was unnecessary to test the lower setting battery life. The lighting area the lanterns offer is pretty decent. They advertise a "10ft² (1m²) lighting area" which is conservative as I could easily get more especially if you are able to hang it up from a tree or stand. The Luci Outdoor Lantern has 3 settings: Bright, Super Bright & Beacon. The Lantern also has two handles, one on each end which makes it easy to hang from your pack to charge or string up for better lighting. 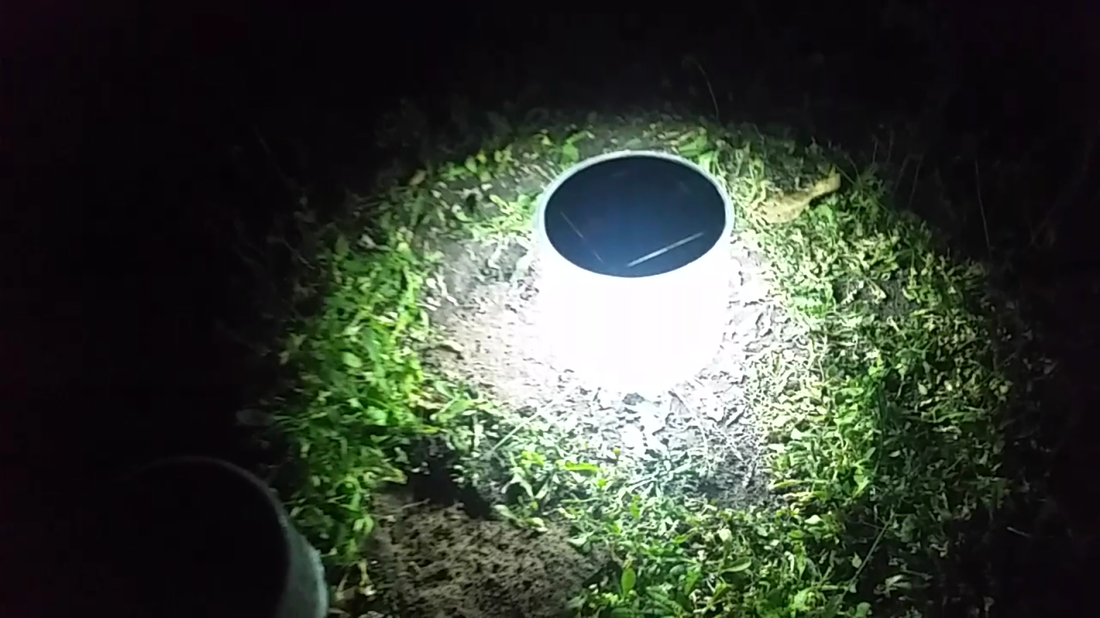 [Luci Outdoor on the ground - "bright" setting] 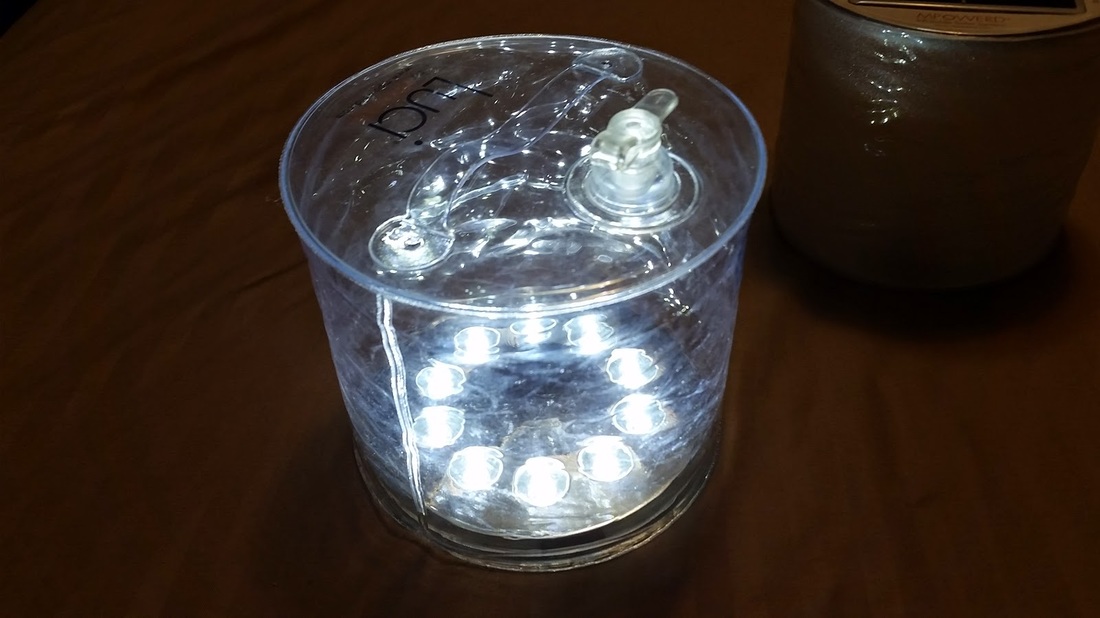 Powered on the lowest setting. The Luci Outdoor Lantern offers 10 bright white LEDs which have a 20,000hr life rating. 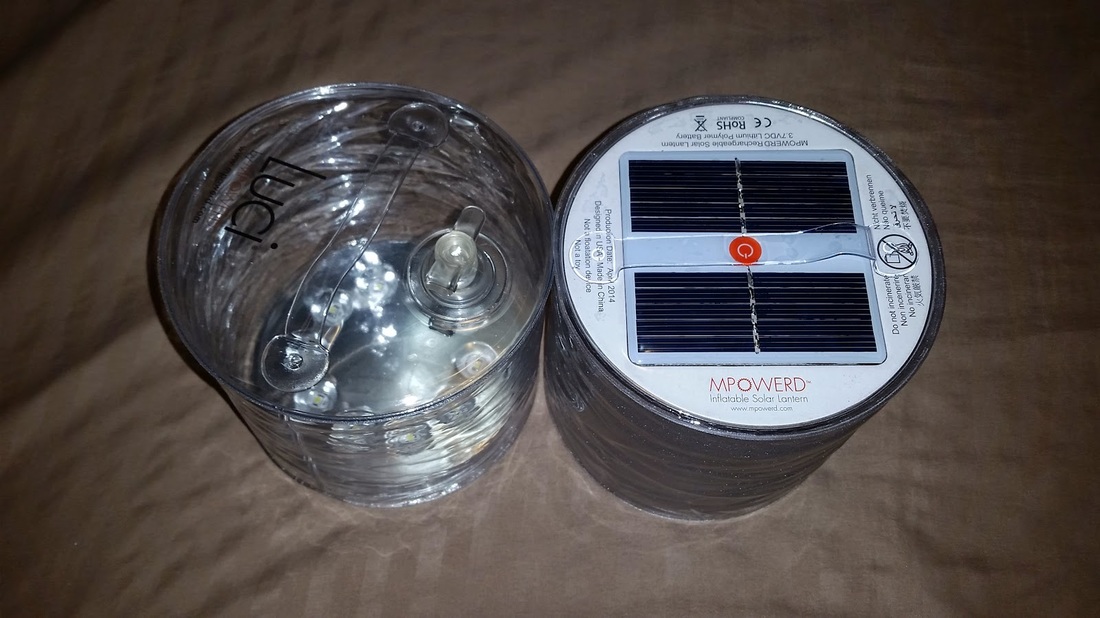 [LEFT: Luci Outdoor - Blowup side] [RIGHT: Lici Aura - Solar Panel side] - The Aura and Outdoor models have the same panels. 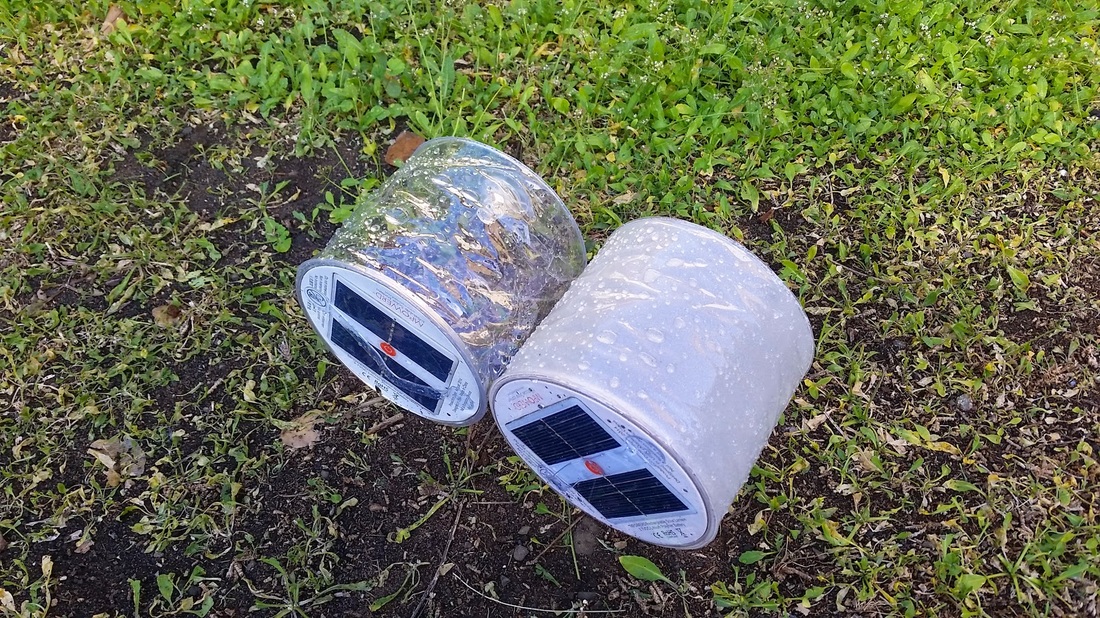 [The morning after the rain] 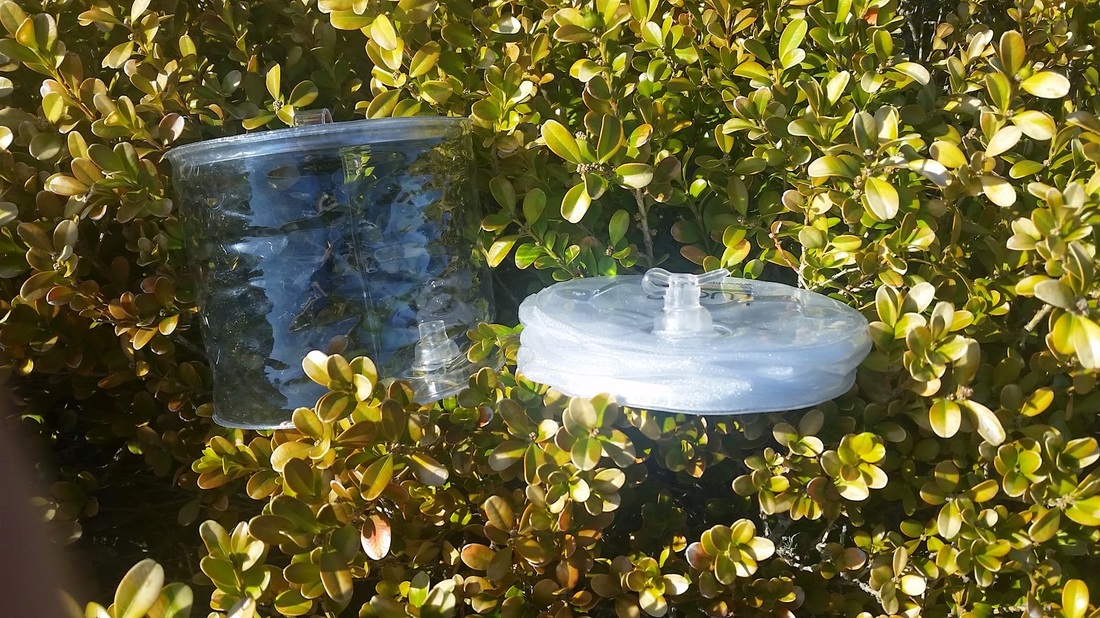 [LEFT: Fully inflated lantern - RIGHT: Fully deflated lantern] The lights worked perfectly fine after spending a night in the rain. I let them sit out the rest of the day and fully charge. Zero issues afterwards.
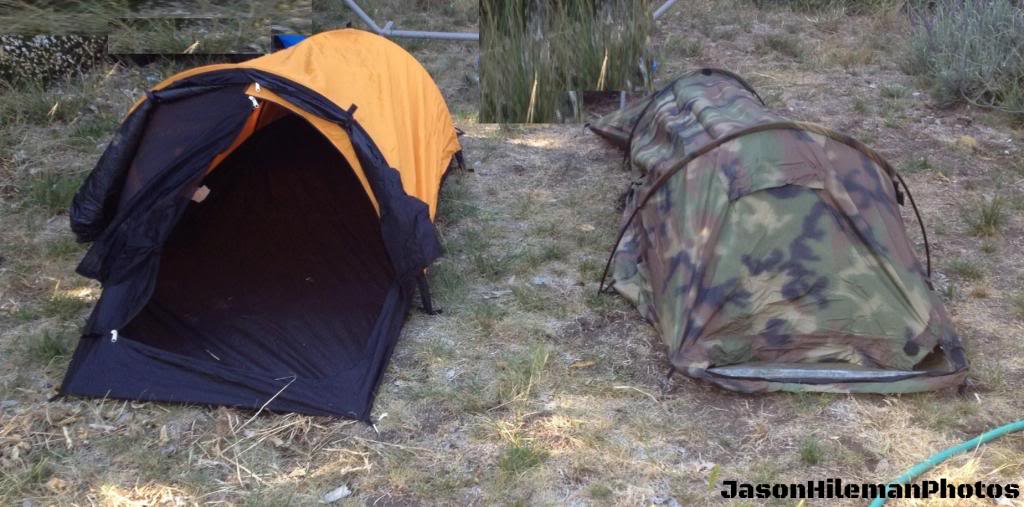
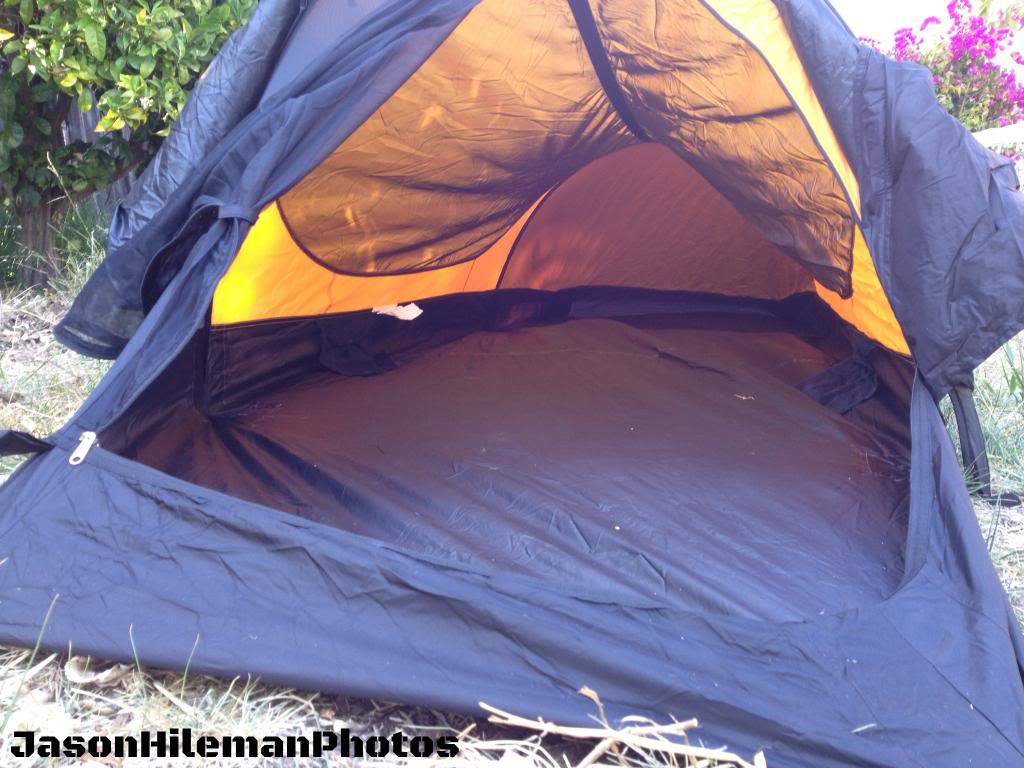
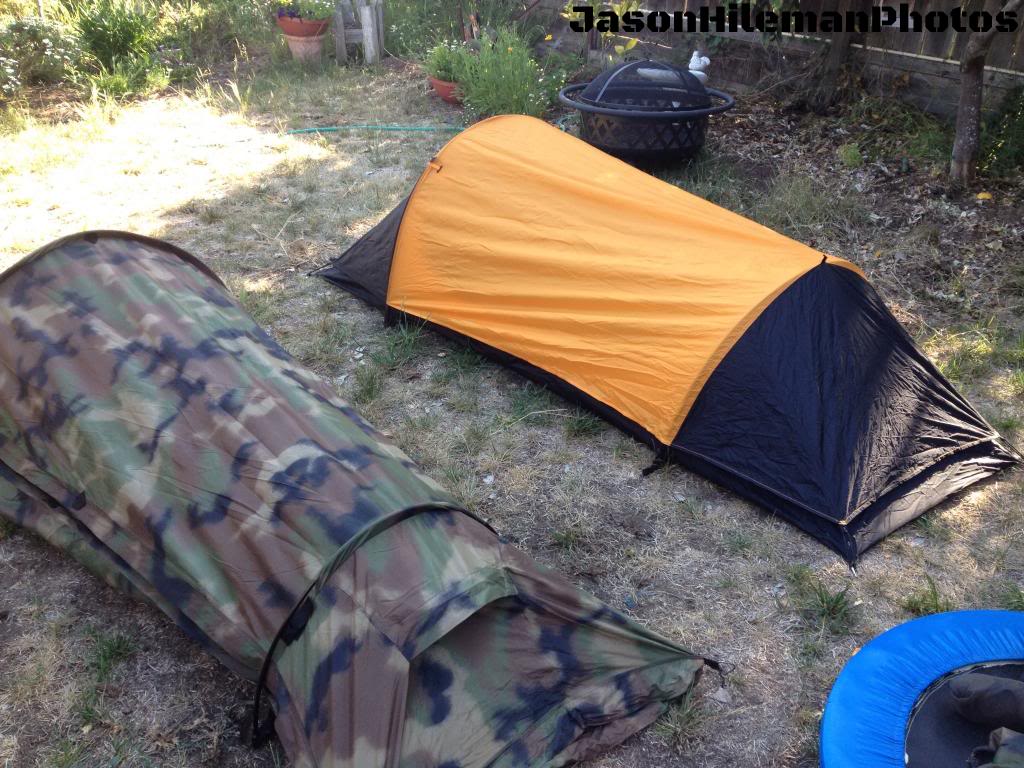
In my opinion these are honestly great little lights! Great for car camping, backpacking, emergency use, fishing, hunting, anywhere you need extra light! I even bought the Luci Aura model for my kids (the Aura model had 7 different colored lights) and they love it! One thing I would like to mention is that the company MPowerd has a program which gets discounted lanterns to those in poverty struck nations, especially those with no power grid. This gives those families more usable work hours in a day and gives them a safer feeling at night. Link to light: https://www.mpowerd.com/products Here is a side by side comparison of the Ecotat TMP Military Shelter/System and the Eureka Solitaire. The pack size is about the same. The Solitaire is bigger in size once setup and made of lighter weight materials. The TMP is very multifunctional compared to the Solitaire (long coat, poncho, winter tent, summer tent, basic shelter, bivvy, rescue litter, etc.The Solitaire wins on the Simplicity comparison - The TMP has more to the design, holes, loops and parts for the different configurations you can do with it. Durability: The TMP would outlast the Solitaire on just about every test from harsh weather to abrasion wear. The TMP comes with well made aluminum poles where the solitaire comes with basic fiberglass poles. The TMP is rated as a 4 season tent where the solitaire is only 3. TMP Setup time: 4 minutes Solitaire Setup time: 3.5 Minutes (without guy lines). Enjoy the pics! If you have any questions on either system - let me know!
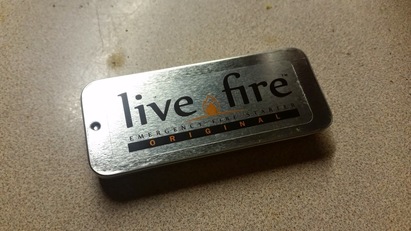
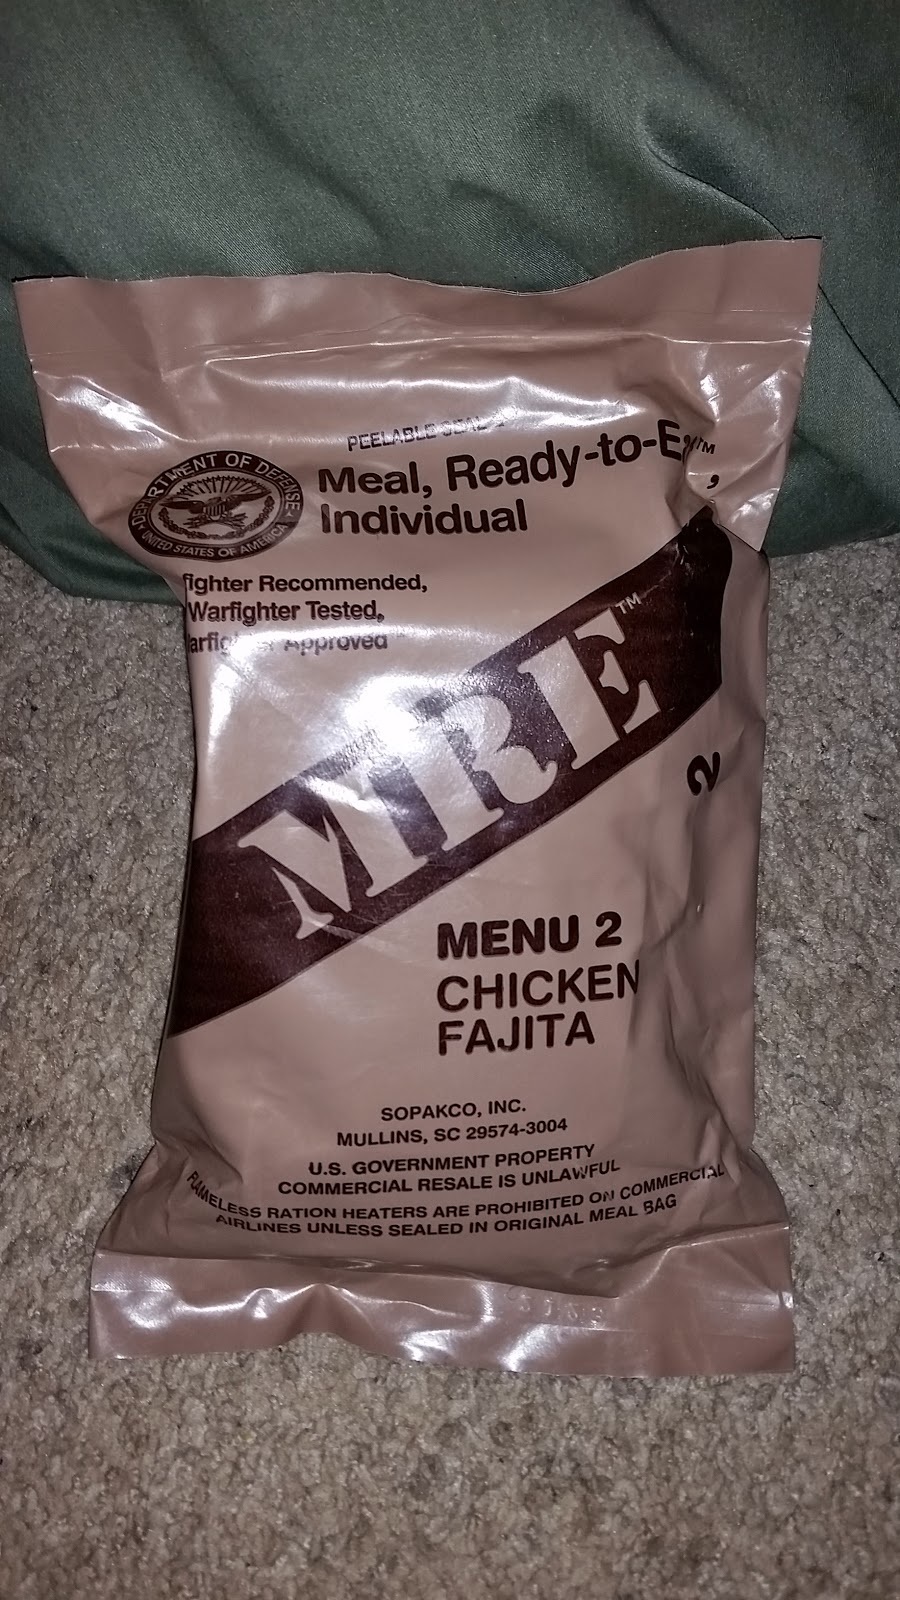
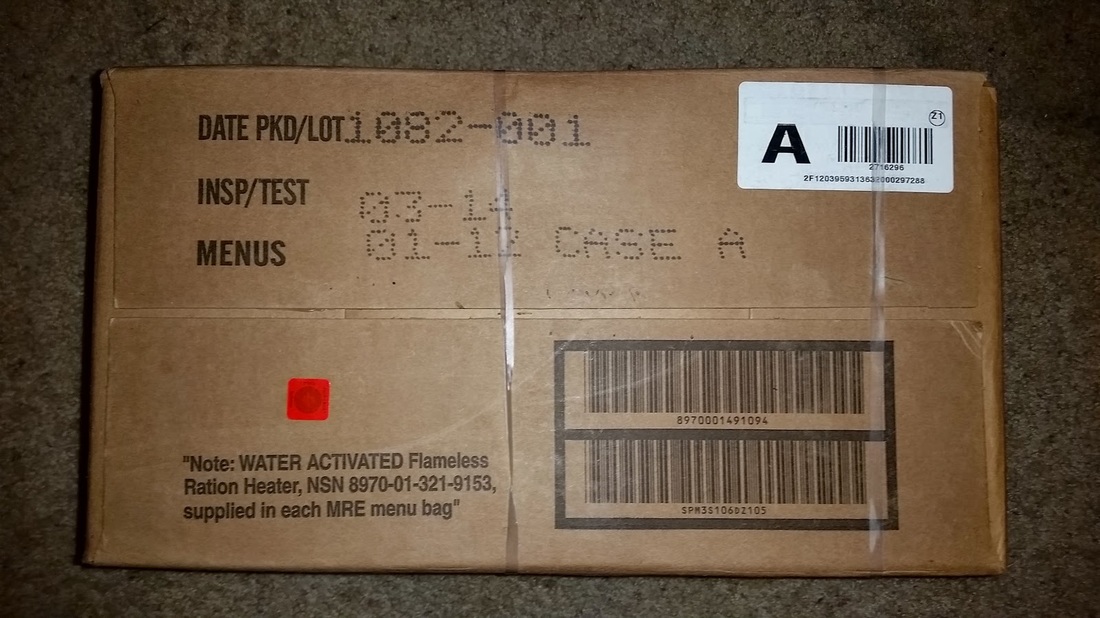
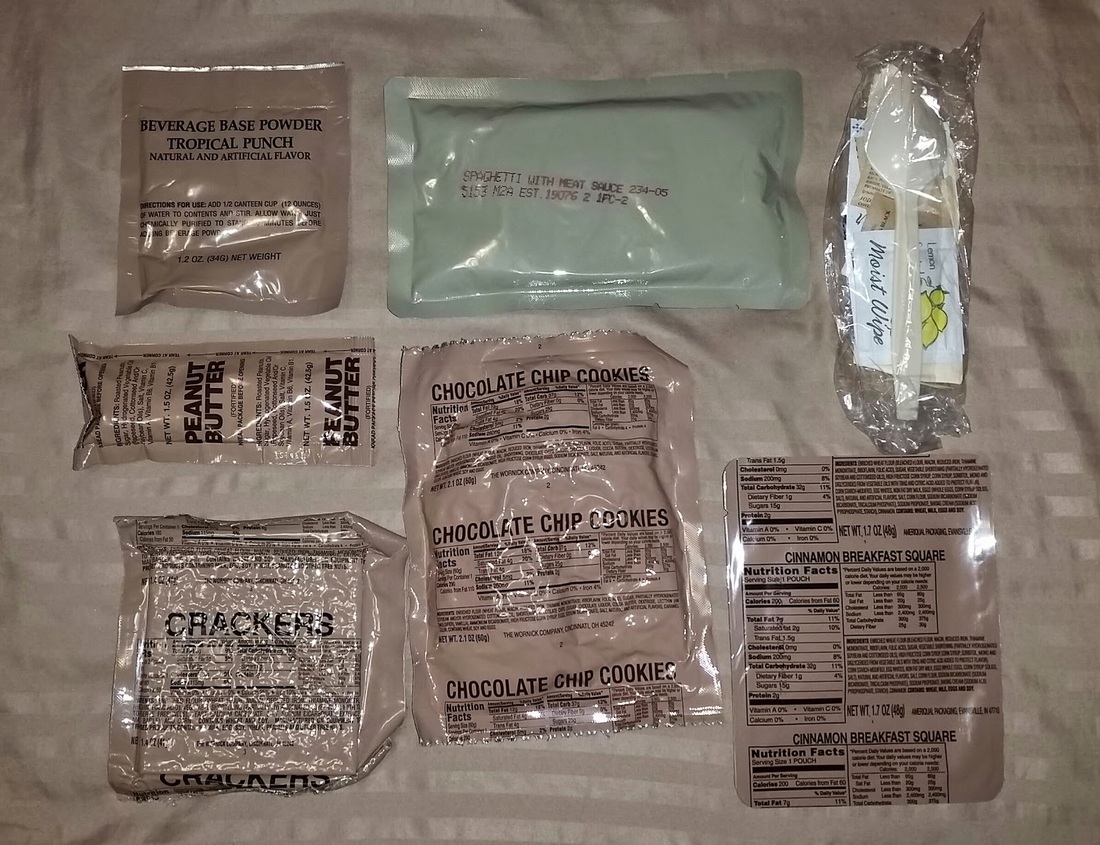
I just recently discovered these little fire starters online. I found them intriguing because of the overall design and application as well as possible uses. First impressions: Very basic and simple design. I opened up the package, slid the lid open and yellow fiber soaked in a hardened wax like material. It has a faint smell of ceder which gets stronger as you burn it. The case is a fairly sturdy light aluminum design. In Use: Per the instructions, I used a tool (this case my knife) to poke and pull up some of the fibers in the case exposing enough fiber to catch a spark, I used my EXOTAC nanoStikerXL firesteel to throw some sparks which the Live Fire Firestarter took on the first try. I only exposed about 1/4 of the fibers (keeping the lid on 3/4 of the way on the tin). The Live Fire Firestarter burned bright and hot! I'm honestly a bit surprised as its performance in those areas. The Live Fire Firestarter does not do well in wind, so it can easily be blown out without proper shielding. 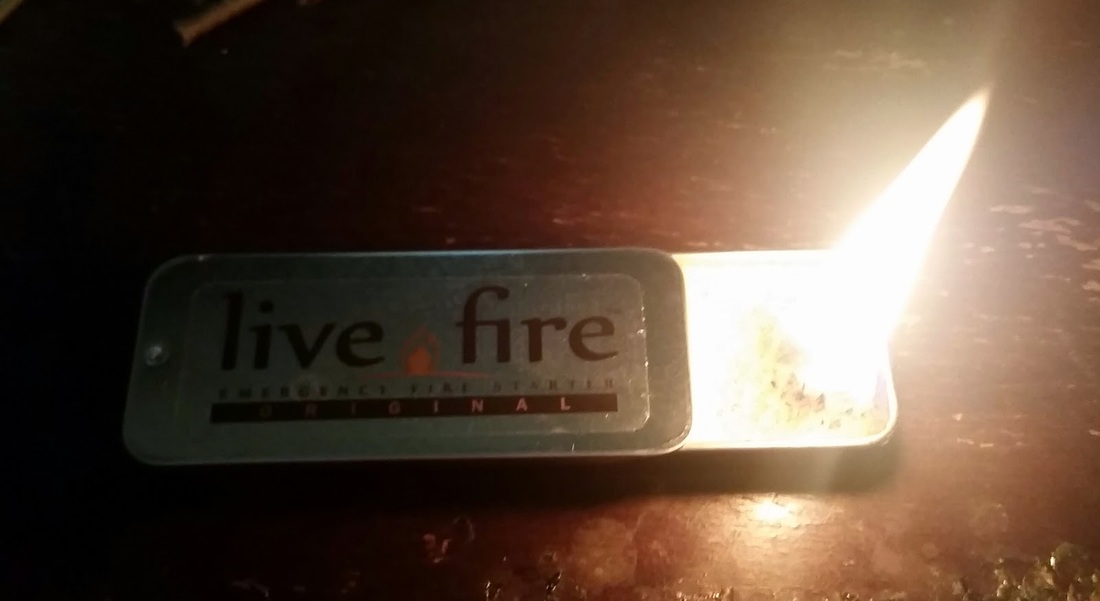 [Live Fire Firestarter burning with about 1/4 of the fiber area exposed] I was curious to see if it would boil water and it sure does. It's not fast by any means but will do the trick in a pinch. I tested 1 Cup of water (65F) - It took about 8 minutes to warm the water to the temperature I would use for coffee or other hot drink and about 14 minutes to boil. 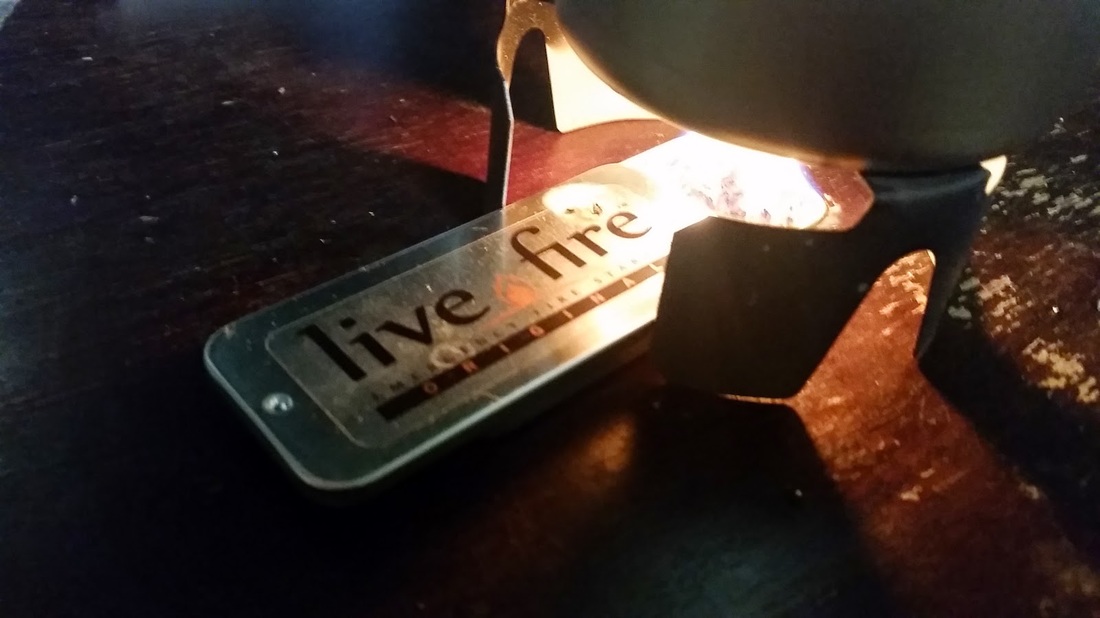 [Using a stand from a Swiss M71 Gel Fuel Stove as a stand with the Live Fire Firemaker to boil water] Conclusion & Features: This makes an awesome fire starter. You can build you regular fire building tinder but use this as the ignition source for a more sure-fire way to get it going. You can use it to boil water if needed. You can use it as a heat source to warm your body, it will work even better in conjunction with a Mylar emergency blanket. After the wax type material burns off completely you are left with a char cloth material which is still usable. Burn time without the lid on is about 30 minutes, or several hours using the lid to limit the exposed fiber for a more controlled burn, so much longer than any other firestarters I've used. This firestarter is also completely waterproof. I think this is one of the longest and hottest burning fire starters I've ever used. Great for any kit! It's worth the ten dollars to me. Final Note: A friend asked me if it leaves black soot when using it as a stove. YES! It leaves a very thick layer, so keep that in mind when using it as a stove. 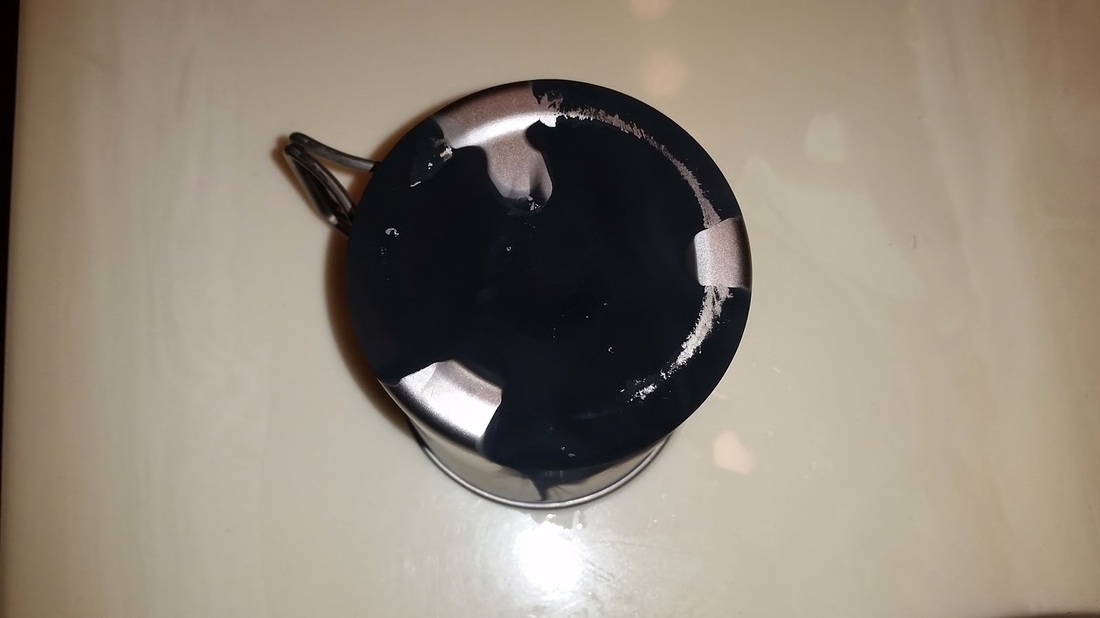 [Black soot left on the cup used for boiling water on the Live Fire Firestarter] So everyone is always looking to find the best option for camping food, right? Personally I've gone back and forth on everything from canned food, ramen noodles, mountain house, military and civilian MREs, homemade MREs or packing what regular food I can take that will last a night or two and still be safe. Of course I will occasionally make some fresh food or cook some bannock bread as well. Right now I typically take stripped down MREs, extra energy bars, beef jerky, single serving oatmeal and a mountain house meal or two depending on the length of my outing. MRE (Meals Ready to Eat). The first real current style MREs started getting issued to the US Military in 1986 even tho they began testing with the more modern MRE back in 1963. Prior to the MRE there was the common C-Ration meals which were canned, these dated back to about 1940 when they began field testing them. USGI Military MREs: These are actually some of my favorites. These usually contain more items and calories than their civilian knockoffs or versions. They are truly ready to eat without any adding of water or preparing. They do come with a MRE heater which is a chemical pack which reacts to a water and heats your meal (I typically only use these when it is cold out). From my experience these pack 1300 to 1600 calories per package. Each pack contains: Main entree, side dish, crackers or bread, snack, candy or desert, jelly, peanut butter or cheese spread, cold drink mix, accessory packet which contains: *coffee or tea, creamer, napkin, wet nap, toilet paper, sugar, salt, pepper, spoon, gum, matches*, tabasco* etc. *tabasco, matches and some other items will vary depending on the meal and year of MRE. These MREs vary in variety in a lot of ways. Each year they make 24 meals (numbered 1-24) and issue them in a case A which contains meals 1-12 and case B which contains meals 13-24. These change every single year. USGI MREs (current issue) are sealed in a light brown package and stamped with "US GOVERNMENT PROPERTY - NOT FOR RETAIL SALE". The cases are brown cardboard, very plain, with simple text such as "INSP/TEST", "MENUS", "CASE B", "DATE PKD/LOT" etc. Military MRE prices vary widely, depending on the sellers, date of MFG and how they are sold. Typically cases will sell for $55-120 and individual meals will sell for $5-12. Keep in mind these are almost always sent to the military before winding up in the civilian market, so there is no guarantee what temperature or conditions they were kept in before you getting your hands on them MREs are advertised to have a 3-7 year shelf life depending on condition. I've personally had MREs that were packaged in 1992 and ate them as late as 2014... They were noticeably not as good as fresh ones but most items were okay. The chocolate bar was a little chalky white but edible. The crackers were a little stale but with the peanut butter tasted okay.
 USGI Military MRE contents. Civilian MREs: The civilian MREs can vary widely, but for simplicity I will group them into one group. These are usually made by the same companies as the military MREs. They can some with everything the military MREs come with, however most come with less. Typically civilian MREs will not come with gum, tabasco sauce, matches, toilet paper in the accessory pack. They usually lack 1-2 food items as well, however it really just depends on the batch. They usually contain 800-1200 calories per package. The cases can be very sporadic in terms of contents and consistency. I've seen cases with 12 different main entrees, 12 of the same in the entire case or just random mixes. The civilian MREs come in mostly clear packages, however there are some companies who try to make them look like the issue MREs by using brown packaging and similar graphics. The civilian MRE cases can vary from only saying "MRE" on the side to having the company logo and information about the contents. Civilian MRE prices can range widely as well. Typically they do sell for 10-25% less than USGI MREs and can typically be guaranteed what conditions they were kept in because they will usually be shipped from the manufacturer to the store where you are buying them from.
Homemade MREs: I've tried many different varieties of these but always have a hard time making it truly "Ready To Eat" without heating and or adding water. I won't go into great detail but my best (or favorite) version consisted of: Chicken or beef top-ramen soup, saltine or other crackers, instant coffee or other drinks, sugar & creamer, napkin, wet wipe, granola or energy bar, matches, little candy, beef jerky, can of chicken, spam pouch, etc, P38 can opener if the can of chicken requires it, jelly or peanut butter. All sealed in a vacuum pack or 1 gallon zip lock bag. What makes these nice is they are cheap to make. typically you can make this for under $3. I also like to add my jerky or chicken to my ramen soup which makes it much more filling and satisfying of a meal. However, if you are planning on doing this for a longer trip, these homemade MREs lack calories. The photo of the one below has a little over 600 calories if I ate and drank everything in there. Suggestions for acquiring stuff to make your own: Dollar Stores! You can get the wet napkins, ramen noodles for, match boxes, jerky, cans of chicken, sugar and creamer packs, instant coffee, crackers, granola bars and peanut butter. You can really build 6-10 of these MRE kits for $12-18... They will typically have a 2-4 year shelf life if you choose the items with the best shelf lives. You can always save left over salt, pepper, napkins, spoons, wet naps, sugar, creamer and other spices from when you eat out... Just about everyone has some of that stuff in the glove compartment. 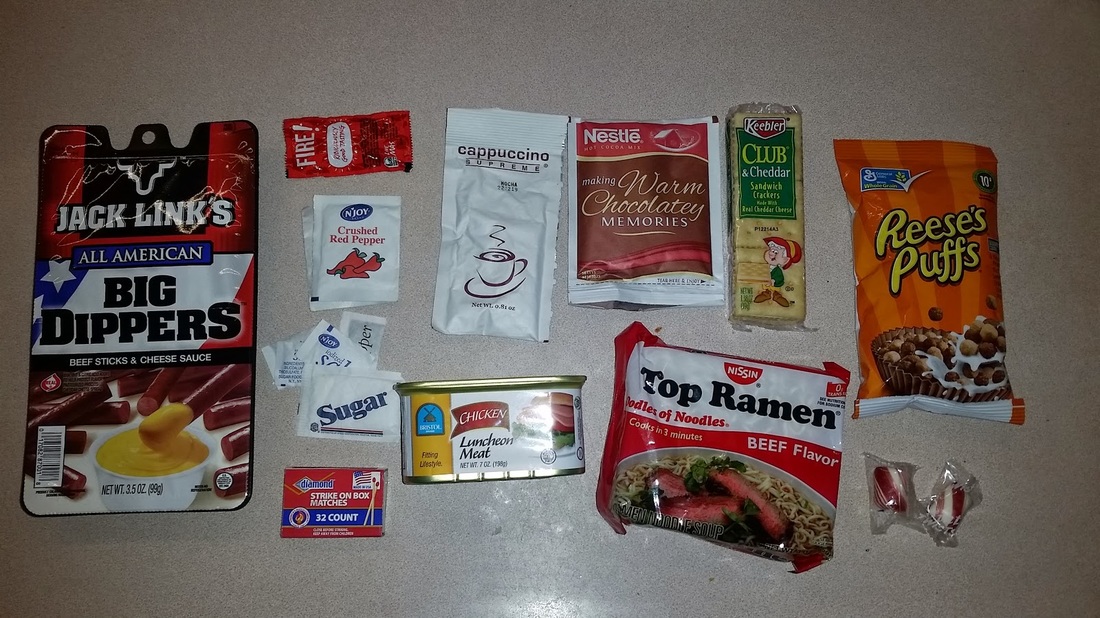 One of my homemade MREs. This cost me $3.15 to put together. Mountain House Meals: I love Mountain House food for a variety of reasons including shelf life, weight, variety, taste and quality. However, they are also more expensive for the most part. I've yet to have one of their meals which I didn't enjoy, I like them all and would buy any of them again. The biggest downfall is they are freeze dried which means they need water and more specifically boiling water. Here in California water isn't something we have in abundance everywhere, so you either have to be 100% sure you are going somewhere where you'll have access to water or pack in a bit of extra water. Another nice thing is Mountain house meals are designed to be prepared inside the pouch, just boil the water in a cup or pot and pour it directly to the pouch, stir and shake then wait for it to cook (typically 10-15 minutes). One thing I would like to mention is the Mountain House pouches can contain servings for as little as 1 person and up to 4 persons, so make sure to check the back of the pouch when planning for a longer trip especially with several people. Most of the main meals are 2.5 servings which work great for 2 people cause we all know 1 serving typically doesn't do the trick. Also note these serving are typically around 300 calories, so make sure you have enough calories for a long trek. Most Mountain House meals range from $3.90-$9.00 and the prices can vary and surprisingly most big store (target, walmart, dicks sporting good are more expensive than smaller stores). Locally the Army/Navy Surplus store has the best selection and prices than anyone in the County. 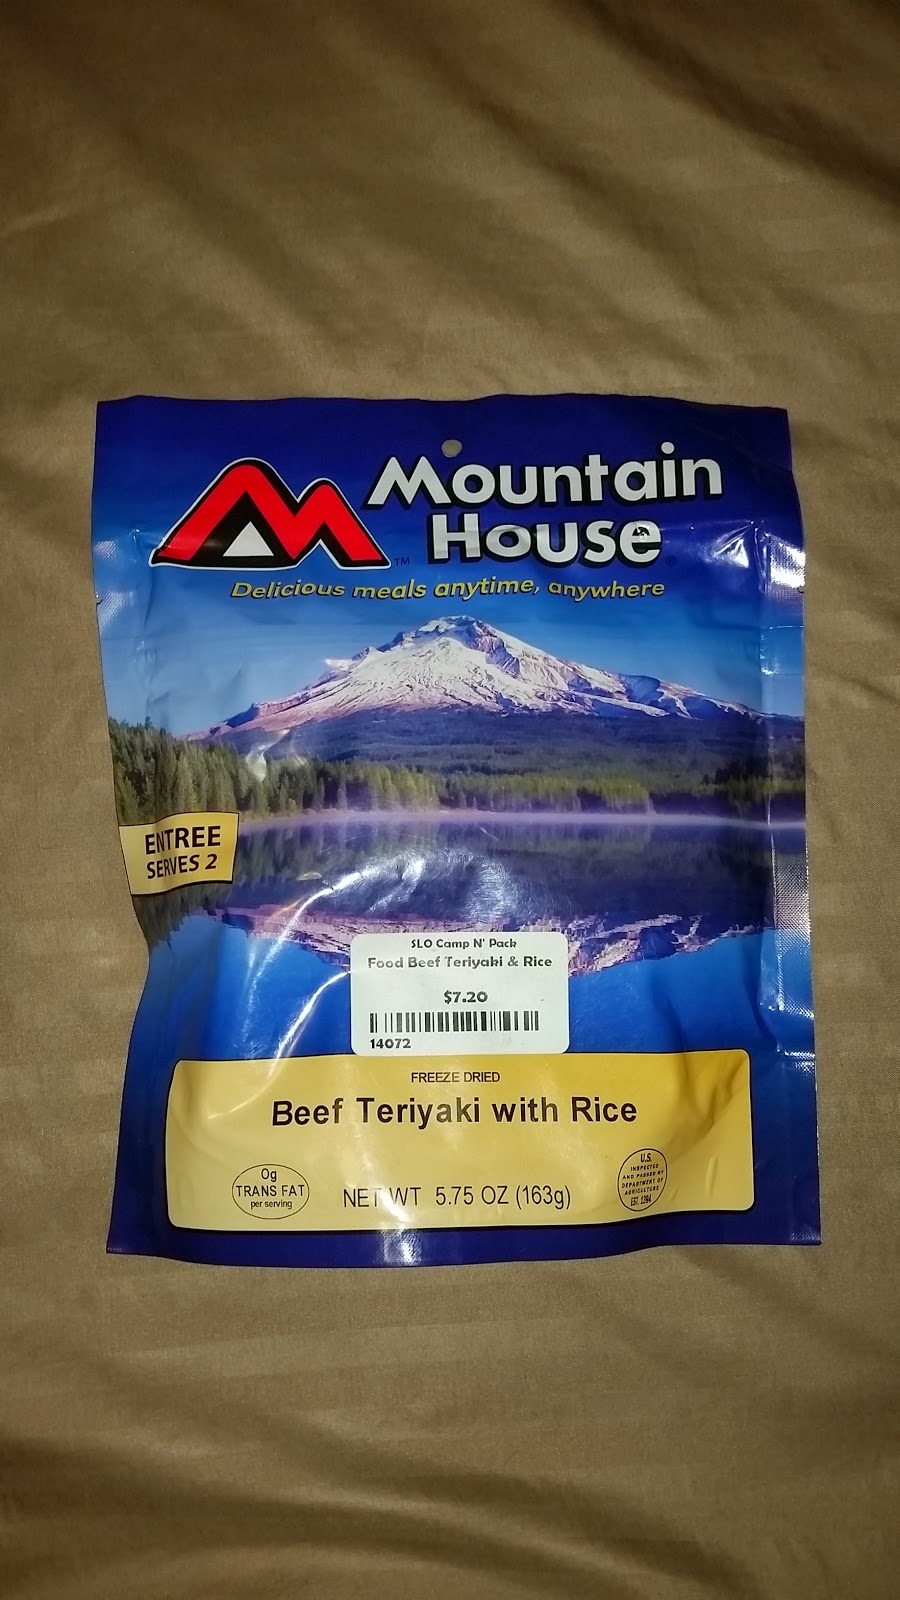 MOUNTAIN HOUSE MEAL POUCH I hope you enjoyed reading my take of camping food.
Feel free to comment below with what you like most and any ideas for other food you take on the trails! |